Creative Pegboard Garage Organization Ideas for a Tidy Space
As an Amazon Associate, I earn from qualifying purchases, at no additional cost to you. Disclaimer
Have you ever found yourself searching frantically for a tool in your cluttered garage, only to wish for a magic solution to make everything neatly organized? I know I have. The secret might just lie in a versatile and often overlooked tool: the humble pegboard. Integrating a pegboard system into your garage can transform it from chaotic to tidy, providing an efficient, customizable organization method that saves space and time.

Click Here to Organize Your Garage Today
Understanding the Pegboard Advantage
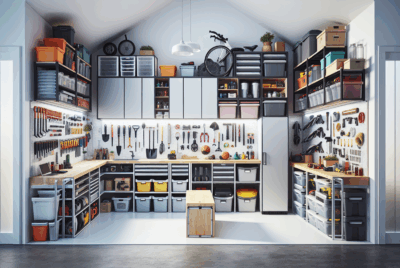
Pegboards aren’t just for workshops. They provide an adaptable solution that can be tailored to fit almost any organizational need. They capitalize on vertical space, which is often underutilized in most garages. By elevating your storage solutions, you can keep your tools and supplies easily accessible and off the ground, making your garage cleaner and safer.
Why Choose Pegboard?
You might wonder, why pegboard? The answer lies in its versatility and adaptability. Pegboards allow for creative customization, letting you design the layout that best suits your unique needs. Whether you’re organizing tools, sporting equipment, or gardening supplies, pegboards can handle it all by simply rearranging hooks and accessories.
What Tools and Supplies Do You Need?
To begin, you’ll need a sturdy pegboard panel, a variety of hooks and organizers, and some basic tools for installation. It’s essential to select a high-quality pegboard that can hold the weight of your tools and resist warping over time. You’ll also want to gather different hook styles, such as straight hooks for hanging items vertically or curved hooks for larger tools.
Planning Your Pegboard Layout
A successful pegboard organization system starts with a well-thought-out plan. Considering what you want to store and how often you use each item can guide your design process.
Assess Your Needs
Take inventory of your garage. What do you use most often? What items are just taking up space? Knowing what you have and what you need easily accessible will help you determine how to arrange your pegboard.
Create Zones
Divide your pegboard into zones for different categories of items. For instance, designate one section for frequently used hand tools, another for seasonal equipment, and so on. This zoning approach not only makes items easy to find but also keeps your setup fluid enough to adjust with changing needs.
Click Here to Organize Your Garage Today
Installing Your Pegboard
Installation is a straightforward process, but there are some key steps to keep in mind to ensure safety and functionality.
Step-by-Step Installation Guide
-
Measure and Cut: Start by measuring the area where you want to install the pegboard. Cut the board to size if necessary, ensuring that it fits comfortably without being obstructed by any doors, windows, or other features.
-
Mark and Mount Support Frames: Pegboards need a gap from the wall to accommodate hooks. Install furring strips horizontally across the wall to create this necessary space before mounting the board.
-
Secure the Pegboard: Position your pegboard over the support frames and secure it with appropriate screws, ensuring it is level and firmly attached.
-
Test and Adjust: Once installed, give it a gentle tug to confirm its stability. Begin placing some light tools first to test the fit and adjust any sections if needed.
Creative Pegboard Organization Ideas
With installation complete, the real fun begins: personalizing and maximizing your pegboard setup.
Basic Tool Arrangement
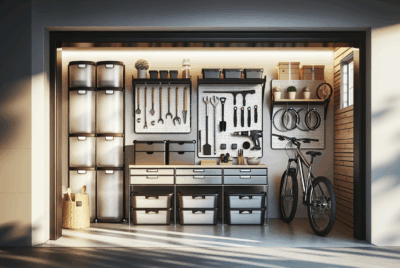
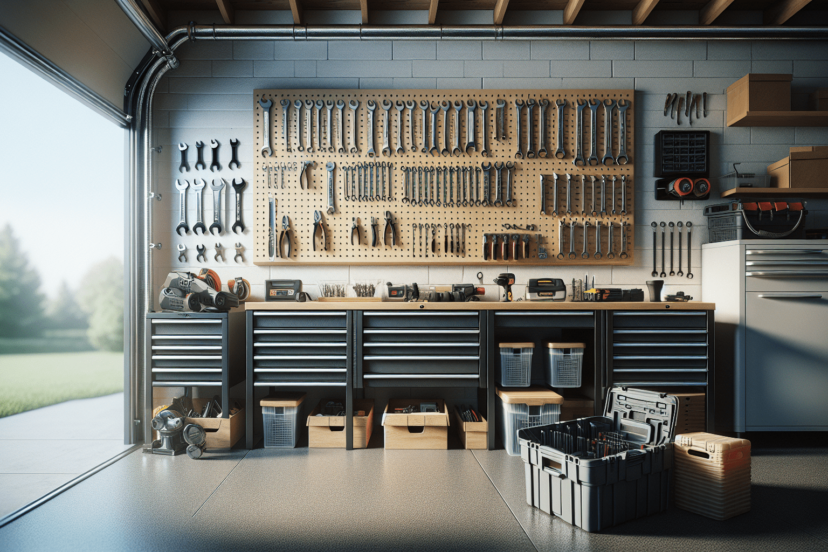
Utilize straight hooks for hammers, wrenches, and other hand tools. Curved hooks are great for heavier or oddly shaped tools that need extra support. Using specialized holders for items like drills or saws can also enhance functionality.
Add Shelving
Incorporate small shelves for items that can’t be hung, such as cans of paint or small bins for nails and screws. Shelves can be secured onto the pegboard using brackets and are a stylish way to add depth and utility.
Use Baskets and Bins
Wire baskets and small plastic bins can clip directly onto the pegboard, allowing for storage of smaller items. They are incredibly useful for things like gardening gloves, glue bottles, or scraps that easily get lost.
Incorporate Magnetic Strips
Magnetic strips are excellent for holding metal tools like scissors or screwdrivers securely. Attaching one to your pegboard can provide quick access to these frequently used tools.
Label Sections
To further streamline your organization, label different zones or sections of your pegboard. This can be done simply with a label maker or even some DIY creativity with markers or chalk.
Seasonal Rotation System
Consider setting up a rotation system for seasonal tools and equipment. By swapping out items based on seasonality, you can keep everything organized and within easy reach when you need it, like winter shovels in cold months and garden shears in warmer seasons.

Click Here to Maximize Your Garage Space
Maintaining an Organized System
Once your pegboard is beautifully organized, the key is maintaining that order. Implement a simple routine or set of practices to keep your space tidy.
Regular Reassessment
Take time every few months to reassess your needs and the effectiveness of your layout. Adjust zones as necessary and remove any items you no longer use.
Set Clear Rules for Usage
Decide on rules for replacing tools once they’re used. Clearly defined procedures help maintain order and involve everyone who uses the garage in collaborative upkeep.
Clean Regularly
Dust and clean your pegboard system regularly, especially if you’re in a dusty or dirty garage environment. Keeping it clean helps inhibit damage over time and increases the lifespan of your setup.
Encourage Family Participation
If your garage is a shared space, encourage family members to participate in maintaining the organization. Assign each person their own section or frequently used tools, so there’s shared ownership of the space.
Utilize Technology
Consider using technology to maximize your pegboard system’s potential. Applications that allow you to catalog tools or even guide simple repairs can be helpful.
By employing these strategies, you can create and maintain an efficient, organized garage. The pegboard serves as a customizable solution that grows with your changing needs, leading to innovation and inspiration every time you open your garage door. Who knew that tidying up could be so transformative and enjoyable?
Markup tags like these—##, ###—and thoughtful planning about section and subsection organization can help improve the article’s searchability and readability. With these organizational ideas and strategies, your garage transformation can be underway while tapping into creative endeavors you never thought possible.