DIY Garage Shelving: Create Organized Storage Solutions
As an Amazon Associate, I earn from qualifying purchases, at no additional cost to you. Disclaimer
Creating your own DIY garage shelving can be a rewarding project that improves both the organizational flow and appearance of your garage.
Building garage storage shelves yourself gives you the flexibility to customize them to fit your exact needs and space. Whether it’s bulky items or small tools, finding a place for everything helps keep the garage tidy and functional.

I found that installing my own shelves not only maximized the use of space but also brought a sense of accomplishment. It’s amazing to see how a little planning and effort can transform a garage from chaotic to neatly organized. The materials needed are usually cost-effective, and the skills required are basic enough for most to handle.
Taking on a shelving project can be a fun way to spend a weekend, and it doesn’t have to be expensive. With simple tools and clear instructions, anyone can start revamping their garage into an efficient storage area. I’ve learned that the key to successful shelving lies in careful planning and creativity.
Planning Your Garage Shelving
When planning garage shelving, it’s essential to focus on your storage space and needs.
Selecting the right materials like 2x4s and plywood is crucial. The design should reflect your home improvement goals.
Assessing Storage Needs
I begin by considering what I need to store in the garage. This helps me decide on the shelving size and type. If I have a variety of items, such as garden tools, paint cans, or sports equipment, I might need different shelf sizes or even hooks and bins.
By measuring the available storage space, I can determine the length and height of the shelves. It’s smart to account for growth by adding extra room for future items. I often sketch a rough layout to visualize the fit and function within my garage space.
Choosing Materials
Material choice is vital. I often opt for 2x4s for framing due to their strength, ensuring the shelves can hold heavy items. Plywood is a go-to for the shelving surface. It’s sturdy and affordable, making it ideal for garages.
If I want something more moisture-resistant, especially for humid climates, OSB (Oriented Strand Board) is another consideration. Although it’s cheaper, it might not hold up as well if exposed to water. Picking the right materials helps ensure longevity and performance.
Design Considerations
For design, I focus on functionality and aesthetics.
Open shelves provide easy access and visibility, which suits frequently used items. Cabinets are better for things I want to hide or protect from dust.
Adjustable shelves add flexibility. I like being able to rearrange them to suit changing needs. Ensuring enough vertical clearance between each shelf is essential. For heavy equipment, reinforcing the structure is necessary. A design plan that balances practical needs with visual appeal ensures both utility and satisfaction in home improvement projects.
Tools and Materials
To create sturdy garage shelving, I need the right tools, materials, and safety gear.
Proper preparation ensures that I can complete the task smoothly and efficiently. Understanding each category helps me avoid surprises along the way.
Essential Tools
For this project, I will need several basic tools.
A saw is crucial for cutting wood to size, especially for cutting 2x4s. A circular or miter saw works well for straight and precise cuts.
A power drill with drill bits is needed for making holes and driving screws. Using a pocket hole jig or Kreg jig helps me create strong joints. With these, I can make quick and easy connections in my shelving frame.
A tape measure and square are essential for accuracy, helping ensure the pieces fit together perfectly. Clamps are also useful to hold the wood steady while I drill or cut.
Materials List
I need to gather quality materials to build shelves that last. Here’s a simple list:
- 2×4 lumber for the frame and supports
- Plywood for the shelf surfaces
- Screws to hold everything together
- Wood glue for extra strength
It’s important to choose sturdy 2x4s to support heavy loads. Plywood is good for the shelves because it’s strong and resists warping. Depending on the planned shelf size, I might need different lengths and sizes of wood. Planning in advance helps me calculate how much I will need.
Safety Equipment
Safety should always be a priority when working on DIY projects.
I need to wear safety goggles to protect my eyes from flying dust and debris. Ear protection like earmuffs or earplugs shields my hearing from loud tools.
A sturdy pair of gloves can help protect my hands from splinters and cuts. Additionally, having a dust mask or respirator is important while cutting wood to avoid breathing in sawdust. It’s also smart to keep a first-aid kit nearby in case I need it during my project.
Building Freestanding Shelves

Freestanding shelves offer a great way to organize your garage. The process involves constructing the frame, assembling the shelves, and adding finishing touches.
I’ll guide you through each step to turn your garage shelving plans into a successful DIY project.
Constructing the Frame
The frame acts as the backbone of the shelving unit.
I start by selecting sturdy materials, like 2×4 wooden boards or metal brackets. I measure the available space in my garage to determine the dimensions of the shelves. It’s important that the frame fits well and leaves enough room for vehicles or other items.
Once I’ve cut the boards to size, I assemble the vertical supports. I find it helpful to use a level to ensure everything is straight. I join the horizontal beams using screws or bolts, creating a rectangular shape. This initial setup is crucial for stability and safety.
I check each joint to ensure it is secure. Any wobbling can be fixed by tightening screws or checking alignment. A well-built frame ensures the shelving unit can support the weight of stored items.
Assembling the Shelving
With the frame complete, I move on to the shelves themselves.
I prefer using plywood or MDF boards for the shelves. These materials are strong and can handle heavy objects without bending.
I cut the boards to fit snugly within the frame. When placing the shelves, I decide the height based on what I’ll store. For example, taller items like bins may require more space between shelves. I attach each shelf to the frame using brackets or angle irons, which stop them from moving.
I double-check that each shelf is level. It’s important that they sit evenly for safety and to prevent items from sliding off. Adjustments can be made by tightening or repositioning brackets as needed.
Finishing Touches
Now that the shelves are in place, I focus on the finishing touches.
Sanding the edges of the shelves and frame is key to avoiding splinters. If I’m using wood, I apply a coat of paint or sealant for a polished look. This step also helps protect against moisture, which is essential in garages.
Labeling the shelves can be useful for organizing my items. This makes it easier to find things later. I might also add rubber or felt pads to the bottom of the legs to protect the garage floor and provide extra stability.
Creating Wall-Mounted Storage

To make the most of wall space, I need to carefully mount shelving units. Wall-mounted storage provides a stable location for garage items, using floating shelves and brackets. The process involves mounting standards, installing brackets, and securing shelves.
Mounting the Standards
First, I locate the wall studs using a stud finder to ensure support. It’s important to mark where each standard will be placed on the wall. Typically, spacing them 16 inches apart is recommended.
Once marked, I drill pilot holes for each screw. Then, I align the standards with the marks and securely fasten them into place using heavy-duty screws. This step is crucial for stability and safety.
Installing the Brackets
With the standards secure, I move on to the brackets.
Brackets need to be inserted into the slots of the standards. I ensure that they are level and at the desired heights.
I can easily adjust bracket heights depending on my storage needs. The brackets must be securely engaged with the standards since these will support the weight of the shelves.
Securing the Shelves
Finally, I place the shelves on the installed brackets. It’s important to make sure each shelf is level and evenly balanced. Depending on the weight and material, I may need to add extra support.
For added safety, I can secure shelves to the brackets using screws. This prevents any accidental knocks or movements. Using sturdy materials ensures the storage solution remains reliable over time.
Overhead and Specialized Storage Solutions

When organizing a garage, overhead storage and specialized units like tool cabinets ensure every item has its place. These solutions maximize space and improve accessibility.
Building Overhead Storage
I love using the ceiling space in my garage for storage. Overhead storage systems provide added room for items like seasonal decorations, sporting equipment, and more. Installing a hanging shelf is a straightforward way to begin.
Materials: screws, brackets, and plywood are helpful. Measurements are key, so I always ensure I measure twice before cutting anything. Checking the weight limit of the overhead system is essential to avoid overloading and potential hazards. The goal is to secure everything safely, keeping the floor space clear and organized.
Customizing for Tool Storage
For me, customized tool storage makes a significant difference.
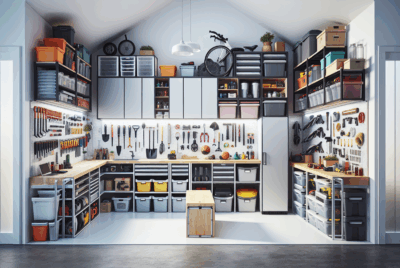
A garage storage wall with hooks, cabinets, and racks can neatly display tools. This setup prevents the misplacement of items and helps in locating tools quickly.
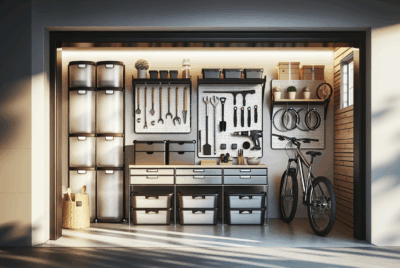
Pegboards work wonders for smaller tools like screwdrivers and wrenches. Cabinets are ideal for power tools. I prefer clear bins for smaller items, ensuring I know where everything is at a glance. Personalizing these spaces based on tool size and frequency of use leads to better organization and efficiency.
Organizing Stored Items
I always begin by sorting items into categories. For example, tools, sports equipment, and seasonal decor can each have dedicated areas.
Labeling helps find things easily. I use clear bins with labels so I can see what’s inside without rummaging.
Arranging frequently used items at eye level is a good practice. I store heavy items closer to the ground to prevent accidents.
Using vertical space is efficient, so I install hooks or pegboards above the shelves for odd-shaped items like bikes or ladders.
Grouping similar items together avoids mixing them up. For instance, placing gardening tools near each other allows for quick access when needed.
This simple categorizing system helps me maintain an organized space and quickly locate items.
Maintaining Shelving Integrity
Maintaining the integrity of DIY garage shelves is crucial. Regular checks for damage and wear keep them safe and reliable. Inspect bolts and screws for tightness and replace any that are stripped.
I keep an eye out for sagging shelves, which might mean it’s time for added support or lighter loads.
Moisture is a common enemy in garages. Avoid storing wet items directly on wooden shelves to prevent warping. I use a waterproof sealant on the shelves if the garage is prone to dampness.
Lastly, balancing the weight distribution on shelves keeps them stable. Overloading one side may lead to accidents.
Keeping these maintenance tips in mind helps ensure the longevity of my garage shelving system.
Step-by-Step DIY Guides
Building your own garage shelving saves money and maximizes storage. I’ll show you how to create freestanding, wall-mounted, and overhead shelves with simple instructions.
Freestanding Shelving Guide
For freestanding shelves, I recommend using wood or metal. Wood is easier to work with if you have basic carpentry skills.
- Select your materials—Either buy pre-cut boards or cut them yourself according to your shelving plans.
- Assemble the frame—Use screws or brackets to secure the shelves.
- Attach the shelves—Place each shelf on the frame, ensuring they are level.
- Add stability—Reinforce with diagonal bracing if needed.
I find these shelves are great for holding heavy items and easy to move around.
Wall-Mounted Shelving Guide
Wall-mounted shelves make use of vertical space. Begin by gathering supplies: heavy-duty brackets, screws, and wood boards.
- Locate wall studs—They provide secure support for shelving.
- Mark placement—Measure and mark where each bracket will go, ensuring they are evenly spaced.
- Install brackets—Attach them to the wall using screws, directly into the studs.
- Place shelves—Lay boards on brackets. Secure with screws to prevent slipping.
These instructions create a strong storage setup for boxed items or lightweight tools.
Overhead Storage Guide
Overhead storage is all about getting things off the ground, perfect for seasonal items.
- Choose your overhead area—Be sure it’s easily accessible with a ladder.
- Install ceiling supports—Add beams or tracks securely from which to hang the shelves or storage bins.
- Install shelf or rack—If using wood, securely attach to the beams.
- Organize items—Use clear bins to keep things visible and clean.
These plans help utilize ceiling space effectively.
Frequently Asked Questions
I have learned some useful tips and tricks for creating strong DIY garage shelves. I can help with selecting the right materials, exploring new ideas, and finding resources for step-by-step instructions.
How can I build sturdy garage shelves using 2x4s?
To build sturdy shelves, I use 2x4s as they support heavy loads well. I start by framing each shelf, using a combination of horizontal and vertical 2x4s for strength. I make sure my joints are secure with screws.
What wood should I use for long-lasting garage shelving?
I prefer using plywood or dense hardwood. Plywood offers durability and is cost-effective. For even more strength, I choose a denser wood like oak or maple. The wood needs to be treated or sealed to protect against humidity.
What are some creative DIY shelving ideas for a garage space?
I like adding hooks to the bottom of shelves for hanging tools. Another idea is to use old wooden crates as open shelves for a rustic look. I always think about vertical storage to maximize space.
Where can I find detailed garage shelving plans in PDF format?
Many online platforms offer free or affordable PDF plans. Websites that focus on woodworking or DIY projects are great places to start. Some of my favorite plans come with step-by-step photos and material lists.
How can I make floating shelves suitable for garage storage?
When making floating shelves, I use strong brackets or hidden supports. I also choose heavy-duty anchors to fasten the shelves to wall studs. This setup provides the strength needed for heavier items.
What are the cost comparisons between building and buying garage shelves?
Personally, building shelves can be cheaper, especially if I use recycled or leftover materials.
While buying ready-made shelves saves time, they often cost more.
I weigh material costs and my available time before deciding.


