How To Replace Garage Door Seal
As an Amazon Associate, I earn from qualifying purchases, at no additional cost to you. Disclaimer
Hi there! Today, I’m going to share with you an easy and practical guide on how to replace your garage door seal. We all know that a well-sealed garage door is essential for keeping out unwanted debris, dust, and even critters. So, if you’ve noticed any gaps or frayed edges in your current seal, don’t fret! I’ll walk you through the step-by-step process, providing you with valuable tips and tricks along the way. By the end of this article, you’ll be well-equipped to tackle this DIY project and have your garage door seal looking as good as new. Let’s get started!
Understanding Types of Garage Door Seals
The bottom seal
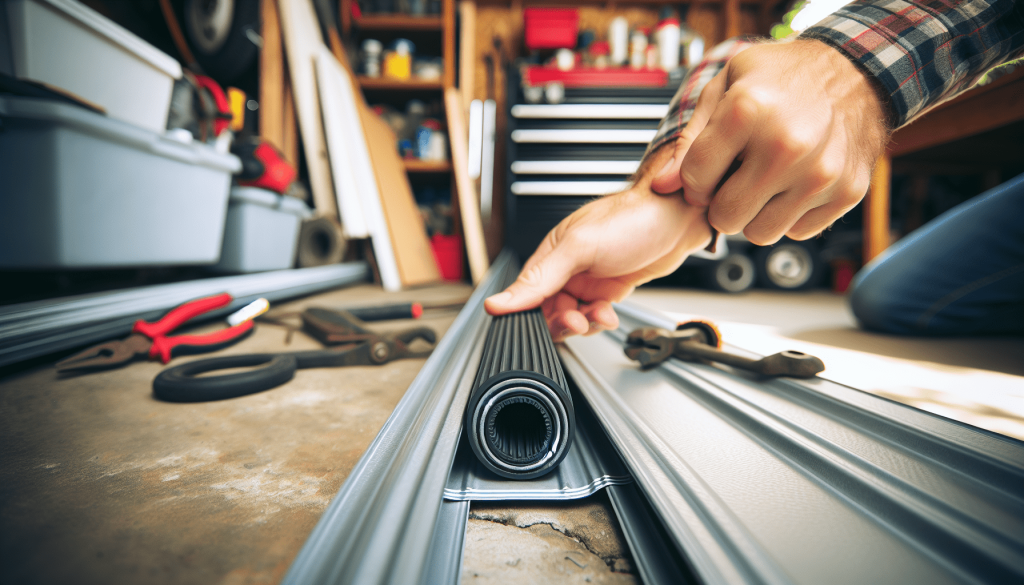
The bottom seal of a garage door is located at the bottom of the door, and its purpose is to create a seal between the door and the ground when the door is closed. This seal helps keep out dust, dirt, pests, and even drafts. It plays a vital role in maintaining energy efficiency and ensuring the garage remains clean and free from unwanted critters.
The threshold seal
The threshold seal is installed on the floor directly beneath the garage door. Its main purpose is to prevent water, leaves, and other debris from entering the garage when the door is closed. It acts as a barrier against moisture, keeping the interior of the garage dry and protected.
The Weather Stripping
Weather stripping is typically applied on the sides and top of the garage door. It provides an additional layer of insulation and helps create a tight seal to prevent air leakage. Weather stripping is especially important in climates with extreme temperatures as it helps maintain a comfortable temperature within the garage and reduces energy loss.
Tools and Materials
What type of garage door seal will you need?
Before starting the replacement process, it’s crucial to determine the type of garage door seal you need. The type of seal will depend on the style and size of your garage door, as well as your specific requirements. There are various types of seals available, such as rubber seals, vinyl seals, and brush seals. It’s important to choose the one that best suits your needs and the climate in your area.
Required tools for the replacement process
To successfully replace your garage door seal, you will need a few essential tools. These include a utility knife, a pry bar or flathead screwdriver, pliers, a hammer, a tape measure, a drill, screws, and a seal replacement kit. It’s important to gather all the necessary tools before starting the project to ensure a smooth and efficient replacement process.
Safety equipment
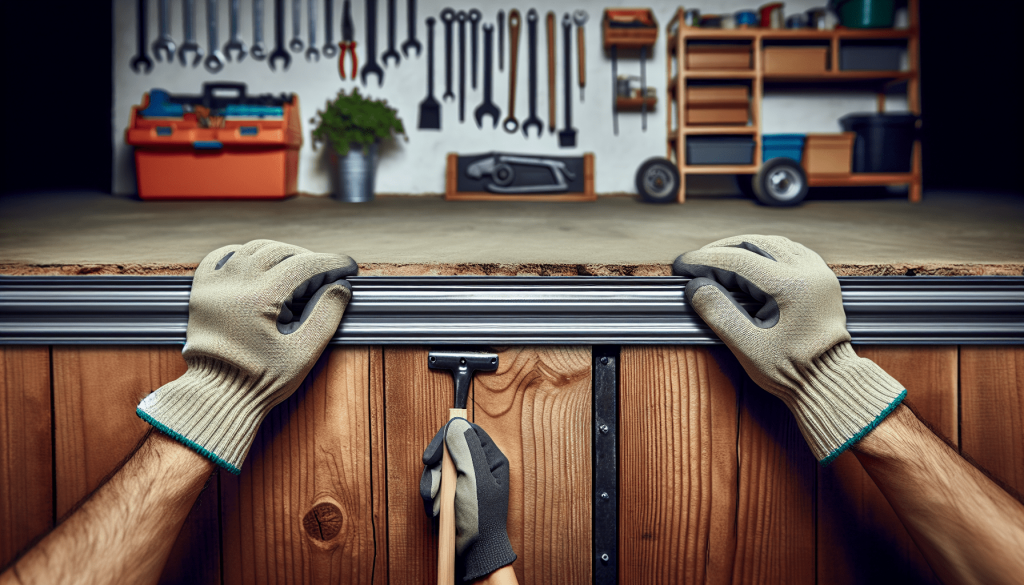
Safety should always be a priority when working on any home improvement project, including garage door seal replacement. Make sure to wear protective gloves and safety glasses to prevent any injuries. Additionally, using a sturdy ladder or step stool will help you safely reach the areas where the seal needs to be replaced.

Assessing the Existing Garage Door Seal
Examine the condition of your current garage door seal
Before jumping into the replacement process, take some time to carefully examine the condition of your current garage door seal. Look for signs of wear and tear, such as cracks, splits, or fraying. Additionally, check for any areas where the seal may have become loose or detached from the door. A thorough inspection will allow you to determine if a replacement is necessary.
Identify signs of damage
During your inspection, pay close attention to any signs of damage. Look for water stains or moisture build-up inside the garage, as it may indicate that the seal is no longer effective in keeping water out. Additionally, if you notice a draft or feel a noticeable temperature difference near the garage door, it may be a sign that the seal is damaged or worn out. Identifying these signs will help you determine the urgency of the replacement.
Determining if a replacement is necessary
Based on your examination and assessment of the existing garage door seal, you can determine if a replacement is necessary. If the seal is significantly damaged, detached, or not creating a proper seal when the door is closed, it’s advisable to replace it to maintain the security and functionality of your garage. Replacing a worn-out seal will also improve energy efficiency and potentially save you money on heating and cooling costs.
Removing the Existing Garage Door Seal
How to properly remove the seal from the garage door
To remove the existing garage door seal, start by opening the door completely. Locate the edge of the seal and use a pry bar or a flathead screwdriver to gently loosen it. Work your way along the seal, separating it from the door as you go. Be cautious not to damage the door or any other components while removing the seal.
Precautions to take during removal
When removing the old garage door seal, it’s essential to take certain precautions to ensure your safety and prevent any damage. Use pliers, if necessary, to avoid exposing your fingers to sharp edges. Take your time and be gentle to avoid causing any unnecessary damage to the door or the surrounding area.
Proper disposal of the old door seal
After successfully removing the old garage door seal, it’s important to dispose of it properly. Check local regulations regarding the disposal of rubber or vinyl materials, as they may need to be recycled or disposed of in a specific manner. Be environmentally conscious and follow the appropriate guidelines to dispose of the old seal responsibly.

Preparing the Garage Door
Cleaning and inspecting the door’s bottom edge
Before installing the new garage door seal, thoroughly clean and inspect the bottom edge of the door. Remove any dirt, debris, or old adhesive left from the previous seal. Use a mild detergent and warm water to clean the area and ensure a clean surface for proper adhesion of the new seal. Inspecting the door’s bottom edge will also help identify any underlying issues that need to be addressed before the installation.
Spotting and addressing potential issues
While inspecting the door’s bottom edge, keep an eye out for any potential issues that may affect the installation or the performance of the new seal. Check for any damage to the door, such as dents, cracks, or warping, as these may need to be repaired before installing the seal. Additionally, ensure that the area is smooth and free from any obstructions that may hinder the proper installation of the new seal.
Making sure the door is ready for the new seal
Once the cleaning and inspection are complete, make sure the door is dry and free from any moisture. Moisture can interfere with the adhesive properties of the new seal and compromise its effectiveness. Take a final moment to ensure the door is in proper working condition, opens and closes smoothly, and is ready for the installation of the new garage door seal.
Installing the New Garage Door Seal
The correct way to install the new garage door seal
To install the new garage door seal, start by measuring the length of the door’s bottom edge and cut the new seal to the appropriate size. Apply adhesive along the bottom edge of the door, ensuring complete coverage. Carefully press the new seal onto the adhesive, aligning it with the door’s edge. Apply even pressure along the entire length of the seal to ensure a secure bond.
Attaching the seal to the door
Once the adhesive has been applied and the seal is aligned, firmly press and hold the seal against the door to create a strong bond. Use a roller or your hand to smooth out any wrinkles or air pockets in the seal. Follow the manufacturer’s instructions regarding the recommended drying or curing time, which may vary depending on the type of adhesive used.
Ensuring secure and proper fit
After installing the new garage door seal, check for any gaps or areas where the seal may not be properly attached to the door. Carefully examine the seal along its entire length to ensure a secure fit. Adjust or reapply adhesive if necessary to address any areas that may need additional attention. A secure and properly fitted seal is essential for effective functionality and energy efficiency.

Checking the Installation
Inspecting the installed door seal
Once the new garage door seal is fully installed, take a moment to inspect it closely. Look for any signs of improper installation, such as areas where the seal may be loose or not properly adhered to the door. Ensure that the seal is evenly aligned along the door’s edge and that there are no visible gaps that may compromise its effectiveness.
Testing the seal with the door
To ensure the seal is working correctly, test it by closing the garage door and observing its interaction with the floor or threshold. The seal should create a tight, complete seal without any noticeable gaps. If you see light shining through or feel drafts, it may indicate that the seal needs further adjustments or additional adhesive. Make the necessary modifications to ensure optimal performance.
Fixing any issues
If you notice any issues during the inspection or testing, address them promptly to prevent further problems. Reapply adhesive or make adjustments as needed to ensure the seal is properly aligned, secure, and effective. It is essential to fix any issues to maintain the integrity of the seal and maximize its functionality.
Maintaining Your Garage Door Seal
Routine check-ups
To ensure the longevity and effectiveness of your garage door seal, it’s important to incorporate routine check-ups into your maintenance routine. Regularly inspect the seal for any signs of wear and tear, damage, or detachment. Address any issues promptly to prevent them from worsening. Routine check-ups will help maintain the seal’s performance and prevent potential problems in the future.
Cleaning tips for the garage door seal
Keeping your garage door seal clean is essential for its optimal performance. Regularly clean the seal with mild detergent and warm water to remove any dirt, debris, or adhesive residue. Avoid using harsh chemicals or abrasive cleaners as they may damage the seal. Additionally, make sure the seal is thoroughly dry before closing the garage door to prevent moisture buildup.
Addressing minor issues before they get worse
Even with regular maintenance, minor issues may arise with your garage door seal. It’s crucial to address these issues promptly to prevent them from developing into larger problems. Repair minor damages, such as small tears or loose sections, using appropriate seal repair kits or materials. Taking care of these small issues will extend the life of the seal and maintain its functionality.

Common Issues and Solutions
What to do if the door seal isn’t fitting perfectly
If you encounter a situation where the new door seal isn’t fitting perfectly, there are a few steps you can take to address the issue. First, check the alignment of the seal and ensure it is properly centered along the door’s bottom edge. Use additional adhesive or sealant in areas where there may be gaps or loose sections. Consider using additional fasteners or clips to secure the seal if necessary. If the problem persists, consult a professional for assistance.
Solutions for a seal that’s not sealing correctly
If you notice that the garage door seal is not sealing correctly when the door is closed, there are a few potential solutions. Start by checking the alignment of the door itself. Adjust the door’s position if necessary to ensure proper contact between the seal and the floor or threshold. If the seal is still not sealing correctly, inspect it for damage or wear and consider replacing it with a new one. A damaged or worn-out seal may no longer provide an effective seal.
Tips to repair minor damages
Minor damages in the garage door seal can be repaired using seal repair kits or adhesive materials specifically designed for the purpose. Follow the instructions provided with the repair kit or adhesive to ensure proper application. Clean the damaged area, apply the repair material, and allow it to dry or cure according to the manufacturer’s instructions. These minor repairs will help extend the lifespan of the seal and maintain its effectiveness.
Professionals Help
When to call a professional
While replacing a garage door seal can often be a DIY project, there may be situations where professional help is necessary. Consider calling a professional if you encounter significant damage to the door itself, such as severe warping or structural issues. Additionally, if you are unsure about the correct installation process or lack the necessary tools and equipment, it’s best to seek professional assistance to ensure a safe and effective replacement.
Estimating the cost of professional garage door seal replacement
The cost of professional garage door seal replacement can vary depending on factors such as the size of the garage door, the type of seal being installed, and the location of your property. Typically, professional services for garage door seal replacement range from $100 to $300, including the cost of labor and materials. It’s advisable to gather quotes from different professionals in your area to get an accurate estimate for your specific needs.
Reputable professional garage door services
When hiring a professional for garage door seal replacement, it’s essential to choose a reputable and reliable service provider. Look for companies with positive customer reviews and a good reputation in your community. Ask for recommendations from friends, family, or neighbors who have previously used professional garage door services. Additionally, ensure that the professionals you hire are licensed, insured, and experienced in garage door seal replacement to guarantee quality workmanship.


